How To Reduce Water Waste?
Most people do not waste water on purpose. It usually happens in quieter ways, a toilet that keeps running, an irrigation system that waters when it should not, a faucet that drips just enough to ignore, or a building system that no one is watching closely. That is why reducing water waste is rarely about one dramatic change. It is more often about noticing the little losses and fixing them before they become expensive habits.
The good news is that real water savings usually come from practical steps, not complicated ones. Once you know where water is being lost, it gets much easier to do something about it.
START WITH LEAKS
If there is one place to begin, it is leaks. A small leak can seem harmless for weeks or months, especially if it is hidden behind a wall, under a sink, or somewhere outside that no one checks very often. But over time, those small losses add up.
That is why regular monitoring matters. Instead of waiting for a high bill or visible damage, it makes far more sense to catch unusual water use early. In homes, that may mean checking toilets, faucets, hose bibs, and irrigation lines. In commercial buildings, it often means paying closer attention to system data, usage patterns, and after-hours flow. When water is being used at the wrong time, that is usually telling you something.
PAY ATTENTION TO IRRIGATION
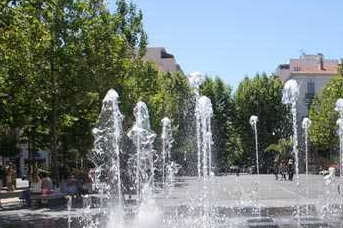
Outdoor watering wastes an enormous amount of water when it is not managed well. Sprinklers run during the heat of the day, water blows onto pavement instead of landscaping, or a timer keeps watering after a rainstorm because no one updated the schedule.
A better approach is to water only when needed and to make sure the system is actually helping the landscape instead of the sidewalk. Smarter controllers, weather-based scheduling, and routine inspections can make a real difference. Even simple adjustments, like changing watering times or fixing a misaligned sprinkler head, can cut waste more than people expect.
UPGRADE OLD FIXTURES AND CONTROLS
Sometimes water waste is built into the equipment itself. Older toilets, faucets, showerheads, and irrigation controls often use more water than necessary simply because they were designed to older standards. Replacing outdated fixtures with more efficient options can reduce waste without making everyday use feel inconvenient.
The same idea applies in larger buildings. If a property is still relying on older monitoring methods or no monitoring at all, waste can go unnoticed for far too long. Better controls give owners and managers a clearer picture of what the building is actually doing.
USE DATA, NOT GUESSWORK
One of the biggest reasons water waste continues is that people assume they would know if something was wrong. Often, they would not. Many leaks are hidden, and many forms of waste happen gradually enough that they look normal until the bill arrives.
That is where monitoring becomes valuable. Real-time water tracking, alerts, and usage reporting help turn water management from guesswork into something measurable. Instead of reacting after the damage is done, you can respond when the pattern first changes. For businesses, schools, hospitals, and large facilities, that shift can save both water and money.
MAKE WATER EFFICIENCY PART OF ROUTINE MAINTENANCE
Water waste is easier to control when it becomes part of normal maintenance rather than a once-a-year concern. Checking for leaks, reviewing usage trends, inspecting irrigation, and replacing worn components should be part of the regular rhythm of running a property.
That does not just protect water. It protects budgets, buildings, and equipment too. Waste is rarely just a water problem. It is usually a sign that something else needs attention.
READY TO GET SERIOUS ABOUT WATER WASTE?
If you want to reduce water waste without relying on guesswork, Waterline Controls offers solutions that help monitor water use, detect leaks, and improve visibility across building systems. The right setup can help you catch problems earlier, use water more efficiently, and make smarter decisions about your property. Reach out to Waterline Controls to learn more about practical water monitoring and leak detection options.
REFERENCES
Waterline Controls
Water Management in Intelligent Buildings and IoT, Waterline Controls
Fire Protection Archives, Waterline Controls
WaterSense, U.S. EPA
Start Saving, U.S. EPA WaterSense
About WaterSense, U.S. EPA
Using Water Efficiently, U.S. EPA WaterSense
Our level sensors and controls aren’t just for use in residential potable water holding tanks; some of the other applications include cooling towers, sump pumps, wastewater, boilers, water storage tanks, and building fire protection water tanks.
